Watercolor Basics
- Become comfortable with teaching basic techniques and the language used in watercolor painting
- Assist students in analyzing their own and others artwork for visual symbolism as well as techniques used
- Be able to demonstrate knowledge in techniques and language of watercolor.
- Analyze and discuss symbols and techniques of historic visual art media.
- Saturation: the intensity of a color.
- Flat Wash: a painting technique that tries to get a “flat” look.
- Wet on Wet: a painting technique that layers wet paint on wet paint.
- Dry Brush: using a brush that has very little moisture to get a specific texture.
- Graduated (gradient) Wash: transitioning to a less saturated color.
- Modernist Painting: rejected past art techniques in favor of abstraction.
- Resist Painting: use of a media that repels the paint.
- Hydrophobic: repels water.
- Hydrophilic: attracts water.
- 2 pieces of paper, preferably watercolor paper of any grade.
- Watercolor paint pans.
- Paintbrush, at least 1 medium sized per student.
- paper towel
- 1 container for water (filled about 1/2 way to help prevent spillage) for every 2 students.
- Pencil
- Additional supplies for Part B: fine tip permanent marker, crayons or oil pastels, and salt * optional, but fun
Step by Step Instructions
This unit covers the fundamental techniques of using watercolor paint. Watercolor paint is a wonderful medium for young students (and older!), it doesn’t stain, the pans are a convenient size, and they are very inexpensive. But, they can create some frustrations for students when they don’t know how watercolor works. It has its own mind in some ways. In part B, students create a painting based on the work of Marc Chagall. After each technique, it’s helpful to ask students what they think it can be used for in a painting, to reinforce learning and help them connect it to their own painting.
1 Getting Started
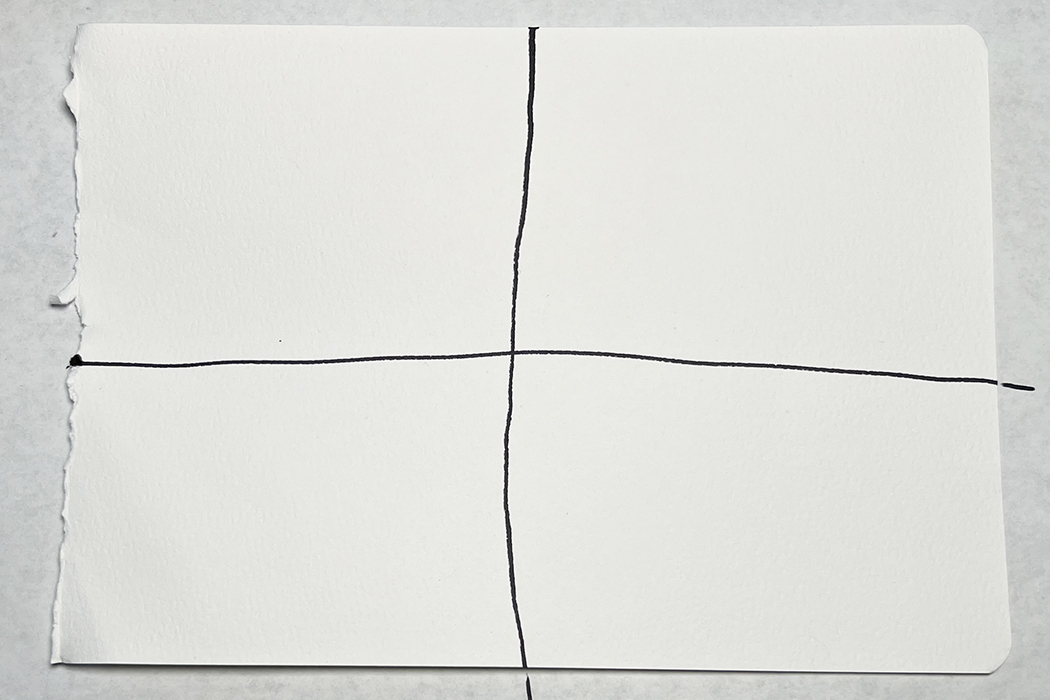
Have students draw two lines, one vertical and one horizontal, through the center of one sheet of paper, creating four quadrants.

2 Play with Saturation
In an out of the way corner or on the back of the paper, have students practice controlling the paint’s saturation level (making their paint more or less intense). The more water they use and the less mixing they do, the lighter the paint will be. Using less water and mixing more will make the paint more saturated (intense).
3 Flat Wash
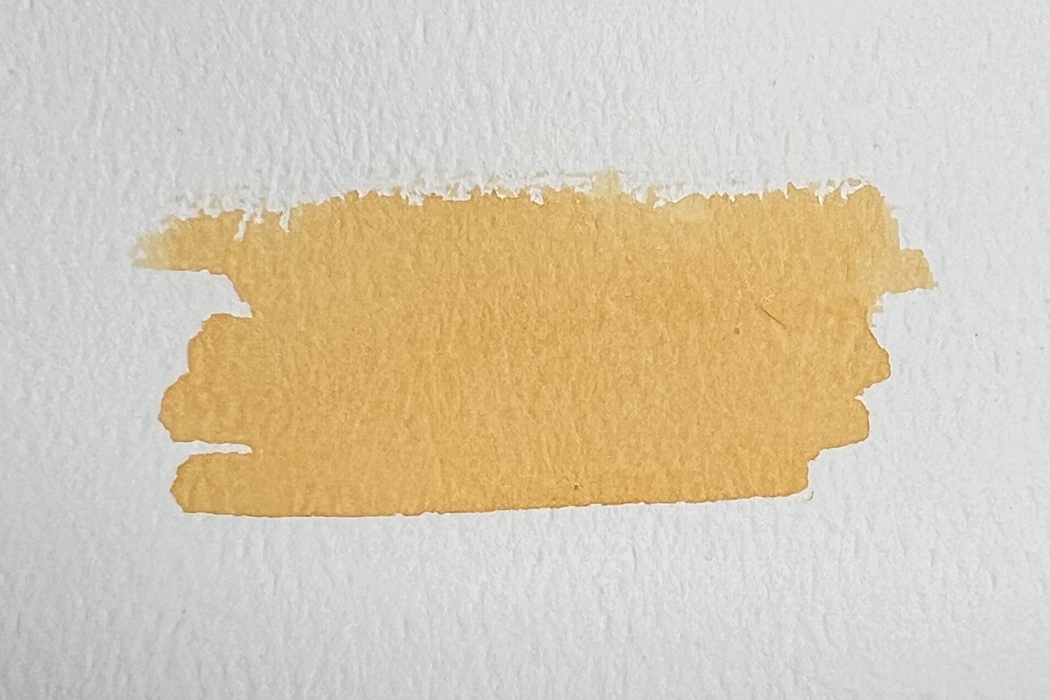
Students will pick a color and use water to mix it to the saturation level they want. They will want to make sure to use quite a bit of water. The idea of this exercise is to make the paint look flat, without a lot of light and dark places. Just one solid color. The look is accomplished by working pretty quickly, and going over their brush strokes more than once to make sure it’s nice and even.
4 Wet on Wet
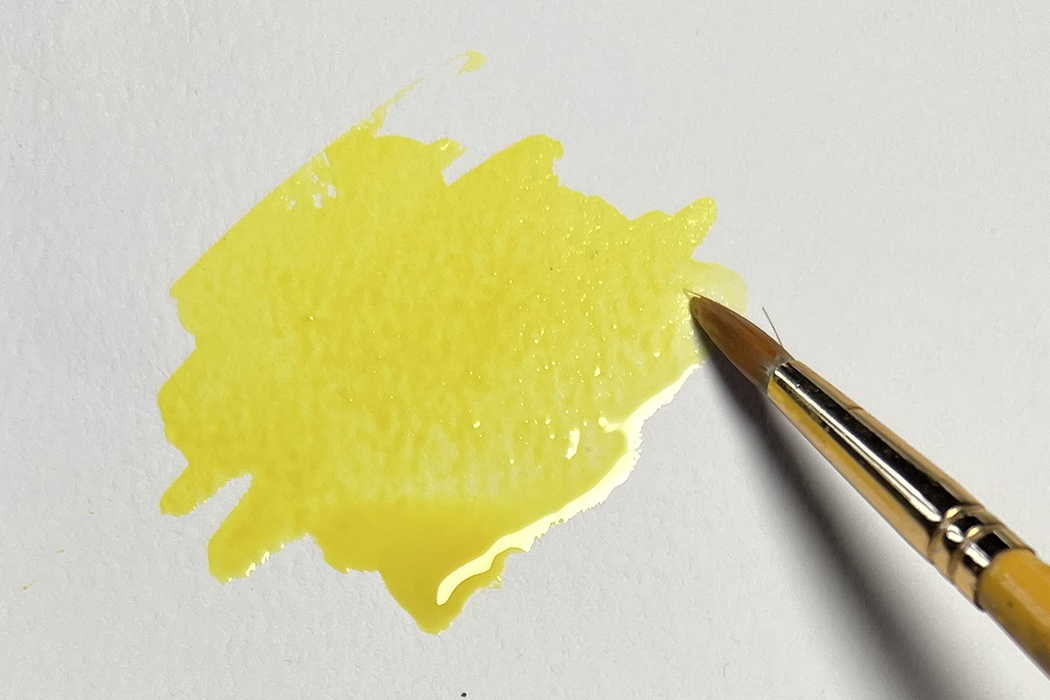
The wet on wet technique is exactly what it sounds like, putting wet paint on wet paint. I’d suggest using a light color for the first color and a darker one for the second so that the second color shows up well. Get your brush really wet for this, it takes more water than other techniques, and paint with your first color.

Before it dries, get the second color on the brush and touch it to the wet paint on the paper. It should bleed out and spread, creating a texture. If it doesn’t, just add more water. While this is a great technique to do on purpose, it can be frustrating when it happens accidentally. To avoid one color bleeding into another, wait until the parts touching what you want to paint are dry. It means skipping around on the painting from section to section, but that can be good for the composition anyway! You aren’t able to focus on just one spot instead of the whole painting.

5 Dry Brush
TThis is another technique that is just what it sounds like, painting with a dry brush. The idea is to get a sketchy texture. To get the look, just barely get the paint wet and mix it to the desired saturation, then get most of the moisture off of the brush with a towel. Drag your brush through the paint you just moistened. Lightly brush it onto the paper. The mark it makes should be sketchy. It’s easy to tell if the paint is too wet, it will go on solidly. Simply dry your brush a bit and try again. This technique is great for leaves on trees, bark, etc.
6 Graduated Wash
Students should wait until the demonstration of the entire gradient wash process is complete before starting to paint, as it must be painted quickly.
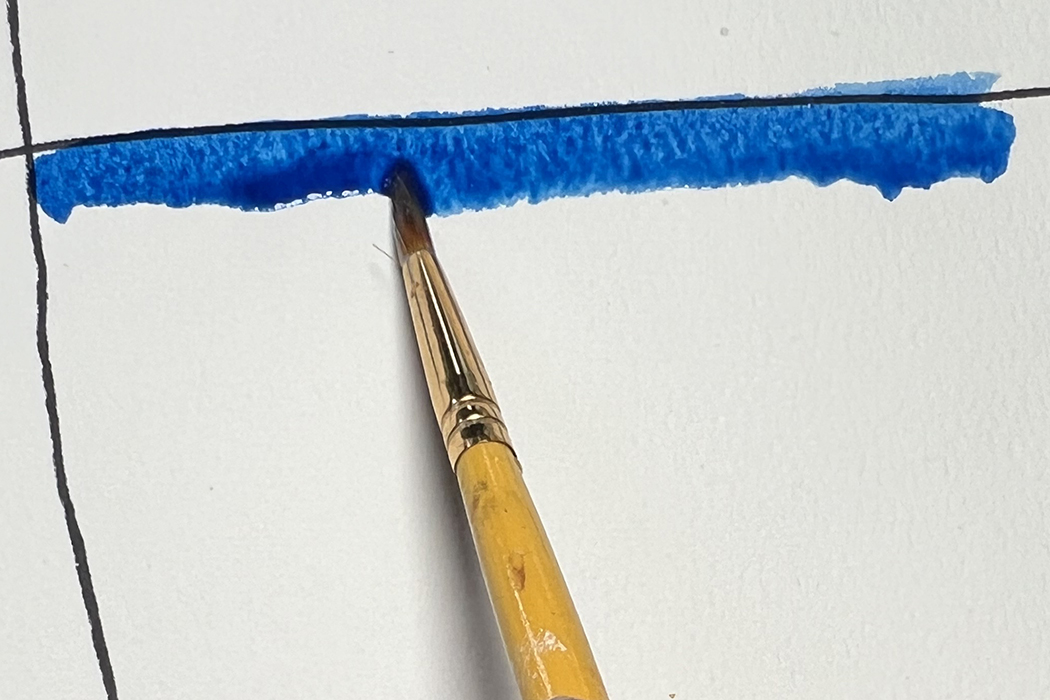
Gradient wash is somewhat similar to flat wash, but instead of one solid color the idea is for the color to get lighter as it’s painted, a gradient.
This is accomplished by getting the brush really wet, and mixing the paint to the desired saturation (intensity). Then brush a line where the gradient is to start, keeping it nice and wet.
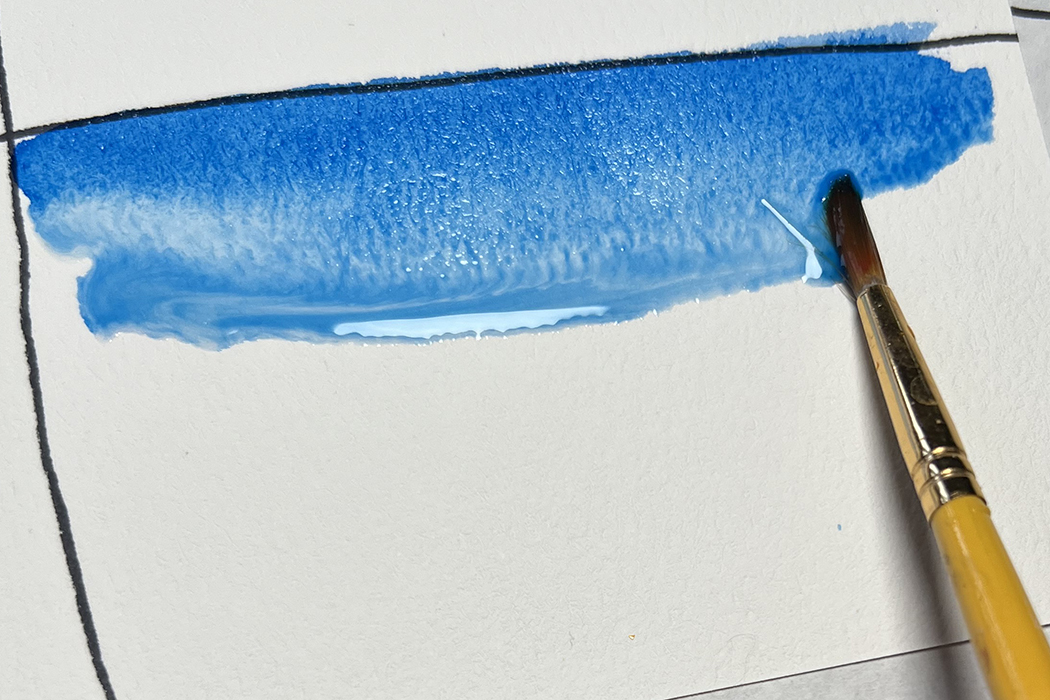
Working fast enough that that line stays wet, dip the brush in water only, not paint, and brush another line just under the first. Continue to dip the brush in water, and paint consecutive lines until reaching the bottom or lightest part of your desired gradient.
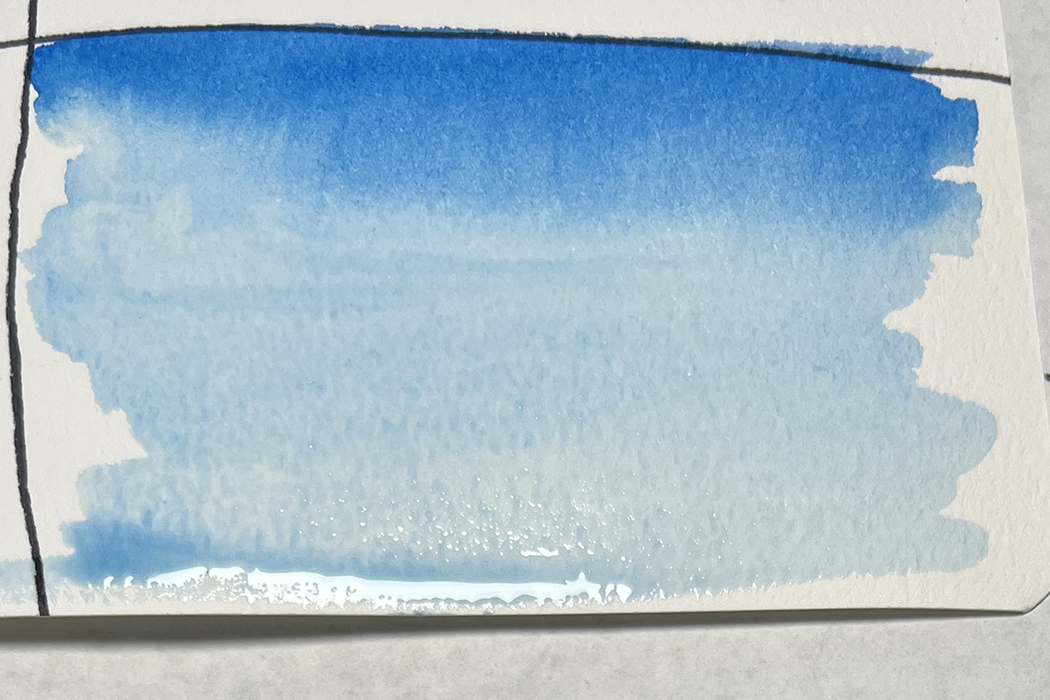
If the paint is nice and wet, it will bleed into the next/lighter lines and blend, but some blending may need to happen with the brush as well. This technique is great for skies, water, petals on flowers, etc.
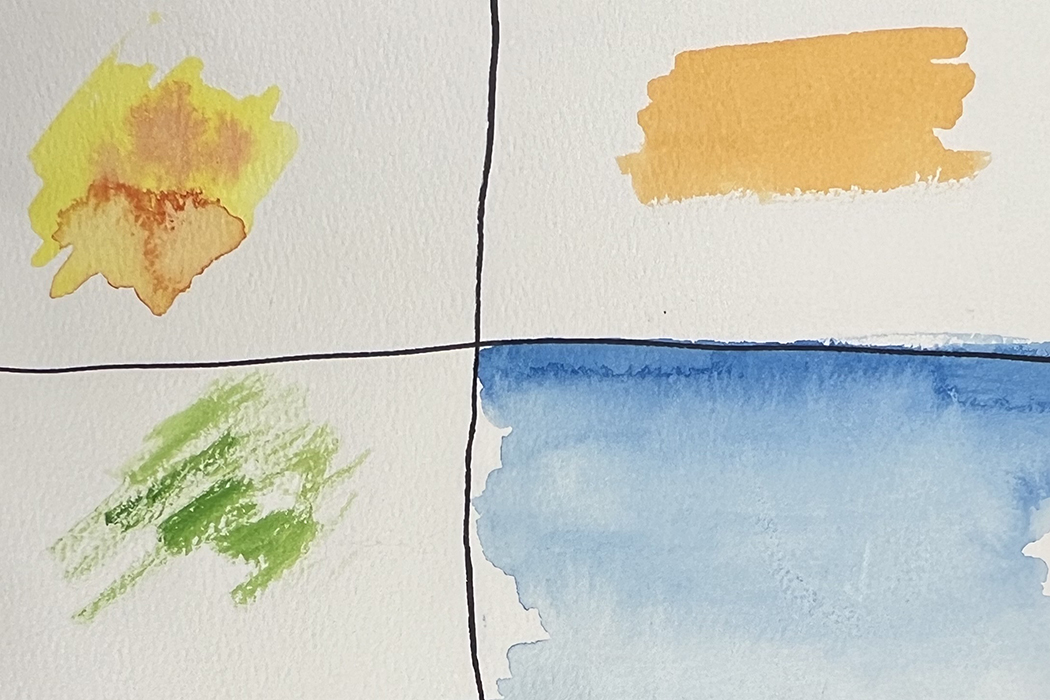
The Finished Techniques
The wet on wet continued to spread, making a nice secondary color (orange) because I used primary yellow and primary red. This can be a great way to teach some color mixing, but I would only touch on it as a “look, isn’t that neat?!” moment for this particular exercise. Color is fun, and will quickly steal the show away from the other techniques and be all that students remember. As a lover of color, I wouldn’t blame them!
Watercolor Basics Part B Dream Paintings with Marc Chagall
About Marc Chagall
- Born in 1897 died in 1985.
- Born in Belarus, which was part of the Russian Empire at the time.
- He was Jewish and living in France in the 1930s.
- He didn’t realize how intense the war was getting until France fell in 1940.
- He was arrested shortly after, but his daughter convinced the German authorities to let him go to avoid embarrassment as he was well known at that time.
- Chagall lacked the financial resources to escape to America, the only place he was able to run to, but his daughter pressed to have he and his wife accepted into a program that brought over notable artists, writers, etc.
- It was only after, in 1943 that he learned about concentration camps, and the devastation of the town he grew up in.
- He moved back to France in 1947.
- Through the years that follow he made theater sets, stained glass windows, designed tapestries, and made ceramics. But, he largely painted, and that’s what he is mostly known for. He’s considered a Modernist painter.
1 Look and Discuss
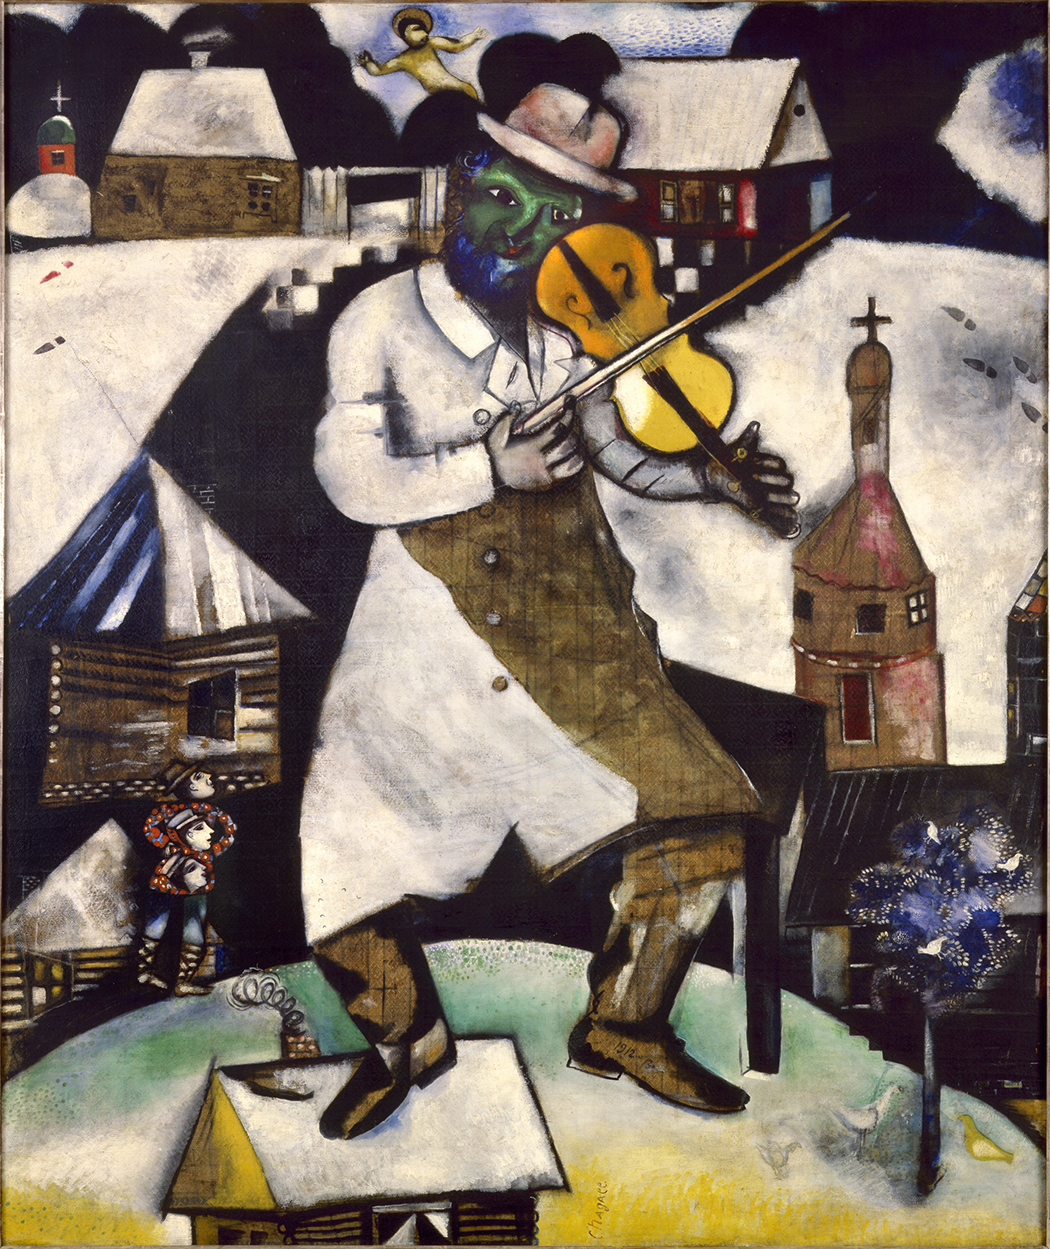
This is “The Fiddler", painted by Chagall in 1913.
This painting, like a lot of his paintings, blends fantasy/folklore/dreams with everyday life from his memories as a child.
- What do you notice about this painting?
- What are some of the little details in it? Some are almost hidden.
2 Drawing it Out
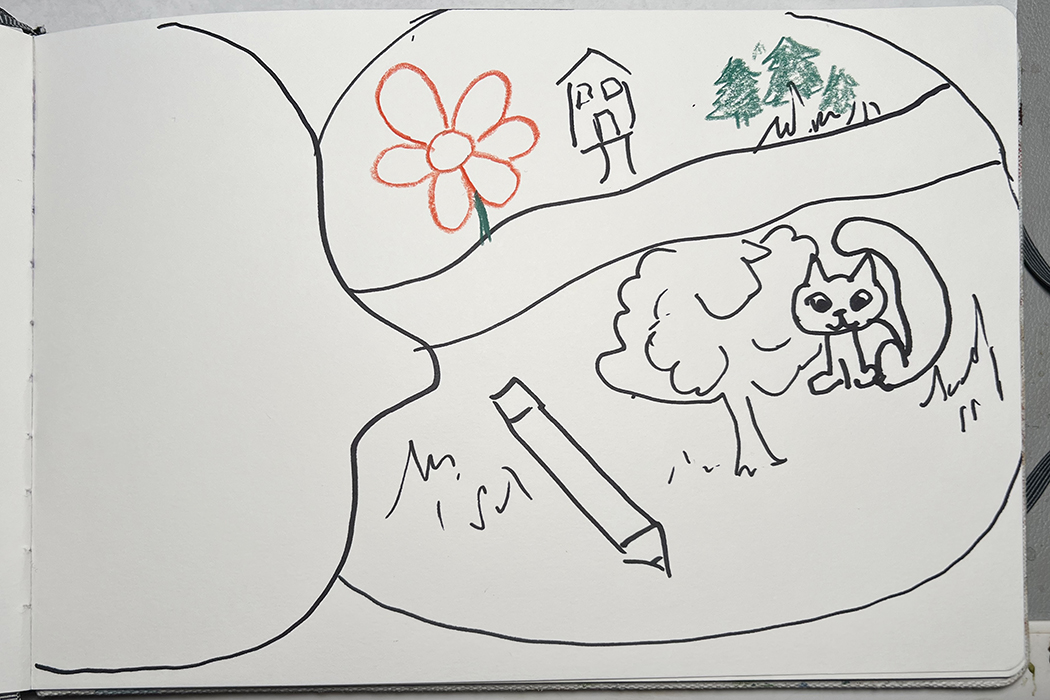
Using a permanent marker, I sketched out a picture that had a face and what could be a thought bubble next to it. In the bubble I drew some symbols of my home, a cat, nature, and a pencil to symbolise drawing. These are symbols of important aspects of my life right now.
3 Resist Painting
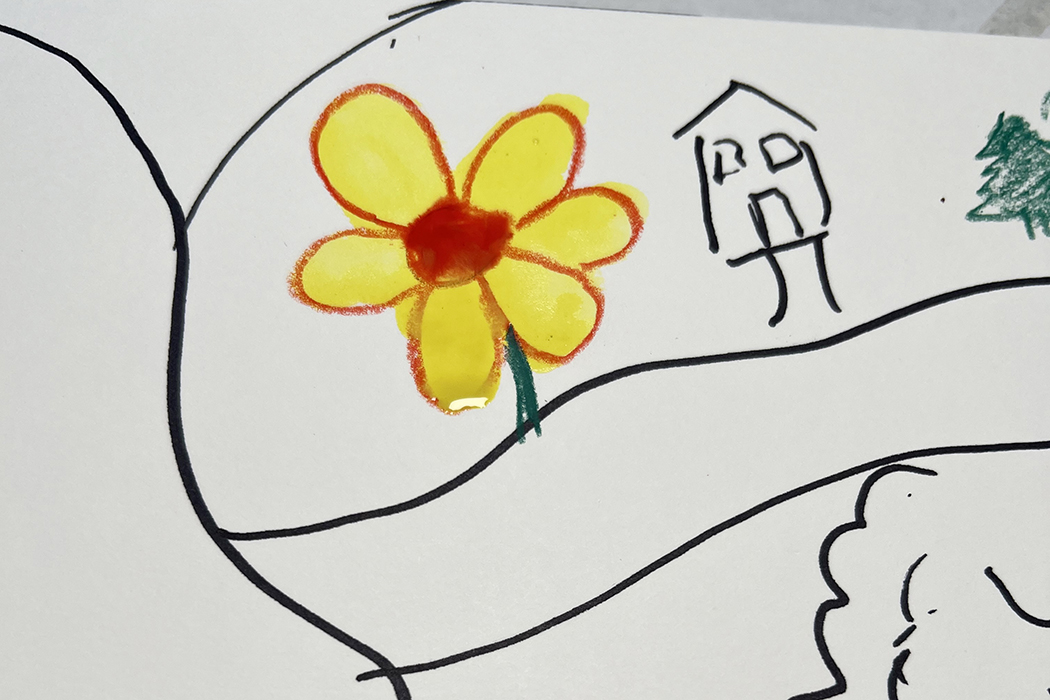
Because the permanent marker is dark and not water soluble, and the watercolor paint is transparent, the marker lines still show up underneath the paint.
The red marks on the flower and the green marks on the tree are crayon. Crayons repel watercolor paint, this is called resist painting. It uses wax’s hydrophobic properties.
4 Think it Out
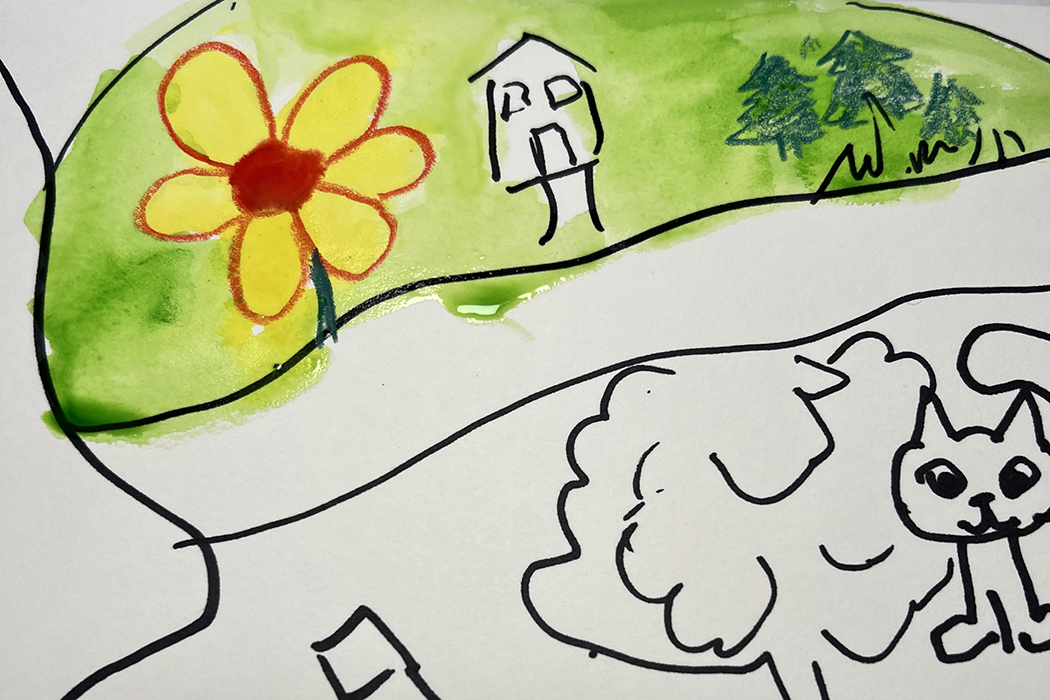
AAs I continue to paint, I’m paying attention to how wet the spaces next to where I’m painting are. I left the house until the green dried so that the paint wouldn’t spread into my green background. But, it was okay with me if the yellow from my flower spread into the green. It looked like yellow flowers.
5 Analyze and Discuss
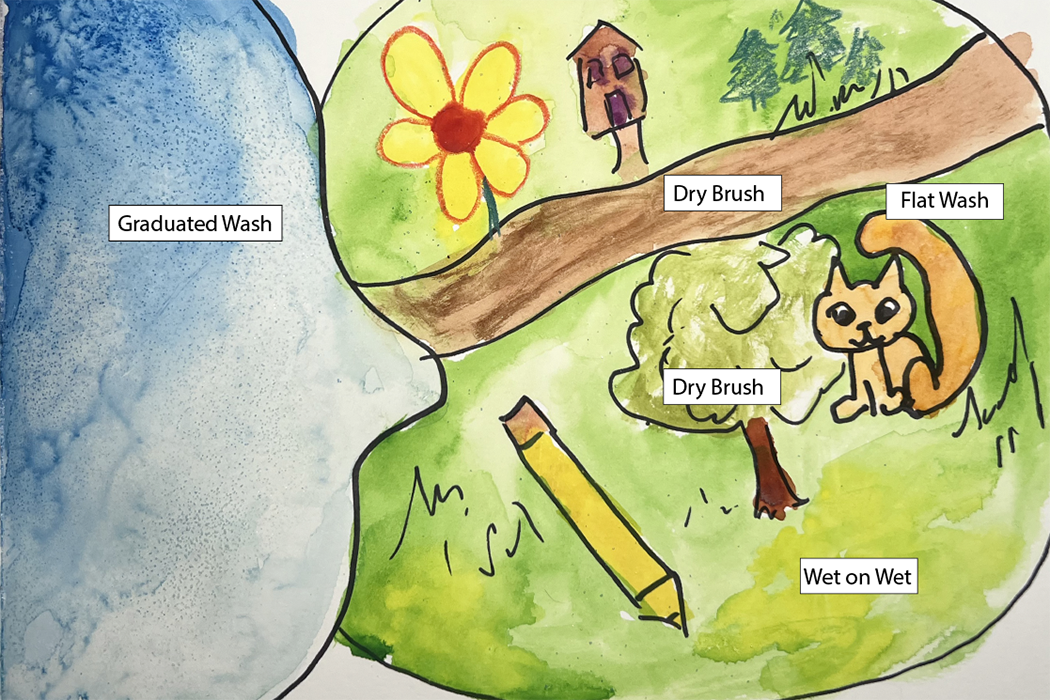
See the example for a breakdown of the different techniques I used in this painting. This is a great time to have students discuss at their table what techniques they used on their paintings, and why.
- Wet on Wet for adding interest to the green, like subtle hints of yellow flowers.
- Graduated Wash for the head, it made it look like a blue sky.
- Dry brush worked well to add leaves to my tree and texture to the pathway.
- Flat wash was a great technique for the grass.
The final step I took was to add salt to the head. It is completely optional, but it’s fun and students usually enjoy it. Salt is hydrophilic, and soaks in the water, which in our case is mixed with pigment (paint) and as a result leaves some interesting textures.